
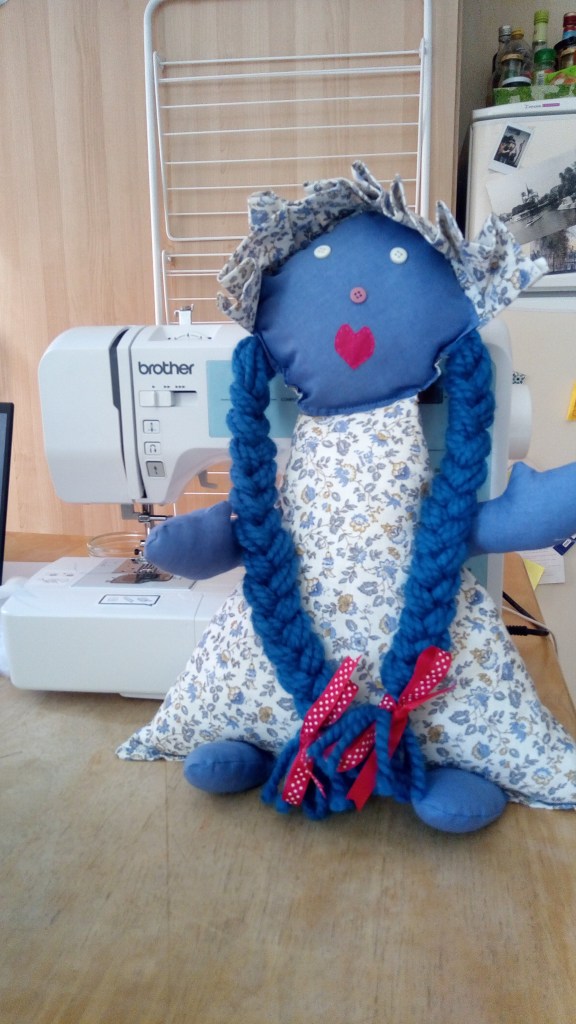
I had this flowery blue material and some wool for a scarf (that I am still making…very slowly!) I browsed a bit for inspiration and came up with my own pattern and creation. My main concerns were to have a sizable size doll that could double up as a cushion to hug.
One small caveat: when making a doll beware of the uncanny-zone !!!
I preferred staying in the abstract side of things with an unrealistic heart shaped mouth after trying out several mouth designs and playing with the idea of painting the face. A part from eventual peeling off issues and the difficulty in washing the doll (especially if it is for a small kid), it looked really scary!
SO unless you’re a pro at drawing I would stick to abstract suggestions of a face like buttons and hearts.
So here goes:
Materials:
- Paper for pattern + pen
- Scissors (if someone that sews is reading this… No, I do NOT use my sewing scissors for paper, that IS a crime!)
- Fabric coupons (one plain + one flowery – make sure the flowery pattern doesn’t have a direction, less headache!) 70×50 cm for the plain and 100×70 cm for the flowery to be on the safe side.
- 3 buttons.
- A small ball of wool.
- Spotty ribbons
- For the mouth I used some leftover fuchsia bias binding…red or pink felt could be a good alternative (and you can glue that!).
- Masses of cushion filling!! I scavenged a good half of an old pillow, the square french kind.
- aaaaand a sewing machine or your pretty little hands and a needle & thread!!
Steps
- Make your pattern!
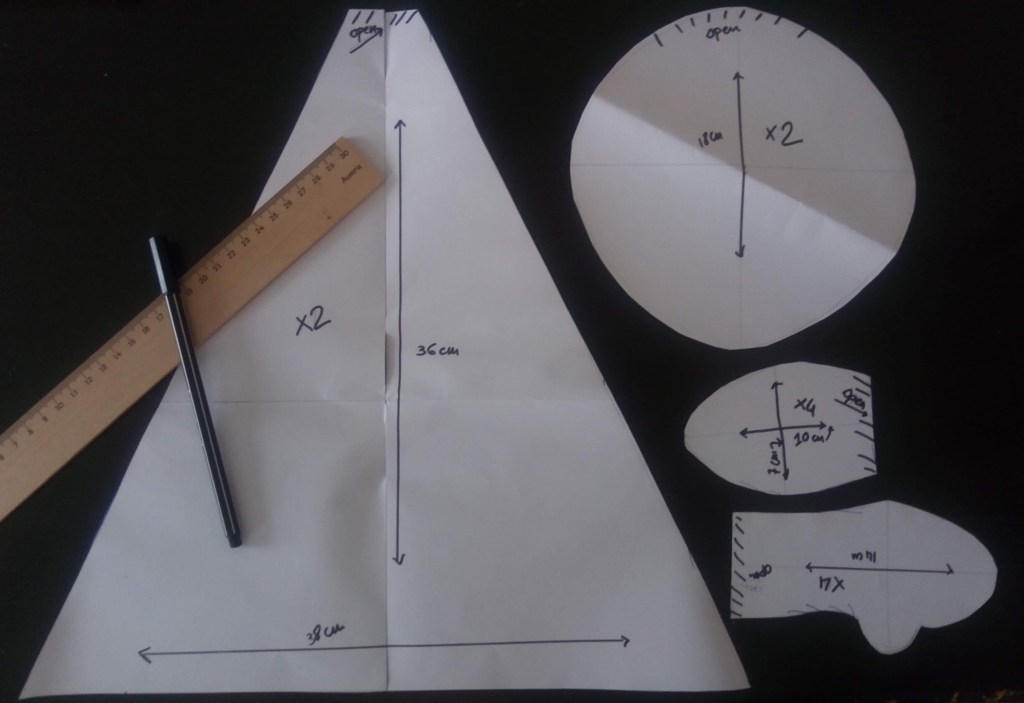
> Make a large paper triangle of 36x38cm and nip off the top (where the opening will be).
> Cut out the head shape: I used a bowl to trace around. It’s more or less 18cm diameter.
> The hands are more or less 14cm long and I did a sort of mitten shape with only the thumb separate.
> The feet are ovals cut off at the top where the opening will be, more or less 10x7cm.
- Cut out the material
>To cut the material place your pattern pieces on the fabric and pin around them. You can then trace around the pattern pieces with a washable pen.
>All margins for sewing are included in the pattern, I usually do a 1cm margin.
> In the flowery material cut out two triangular shapes, that will make up the dress, and one round for the back of the head. You can also have a plain material for the dress and then play with ribbons and lace to make a sweet collar or fake pockets as decoration. You should have enough left over of the flowery material for the head ruffle. It’s about 14cm large and 50cm long (lots of ruffles).
>In the plain material cut out 1 round for the face, 4 hands and 4 feet.
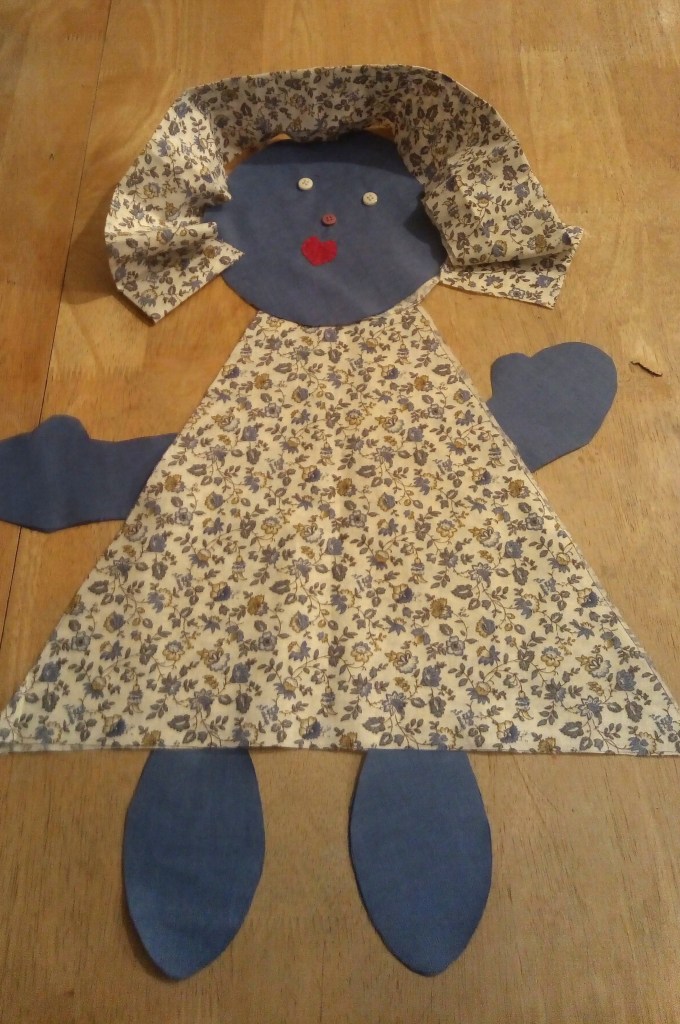
- Assembling
>First make the face sewing on the buttons and the mouth. Especially for young kids, you want the buttons to be really strongly sewn on.
>Sew around the feet and the hands (rights sides together, to have the rough edges inside when you turn it inside out) leaving a space where on the pattern it says ‘open’.
>Make the head frill and the plaits and pin into place sandwiched between the two head circles (right sides together). This is a tricky bit, before sewing make sure to keep the rest of the plaits out of the way, I pinned them together. Sew around the head (leaving a gap where it says ‘open’) making sure to go backwards and forwards on the end of the plats for extra strength.
>Sew around the two triangles leaving the ‘open’ space + open holes for adding the feet and the hands. I just positioned them on the fabric and decided where I wanted them to sit.
And voilà!

One thought on “Fabric doll – DIY”